DeepSeek Harness
Download DeepSeek Harness, then connect it to CheapAI with CC Switch or Folkbench Switch.
If you haven't installed a setup tool yet, start with Setup tools (required).
Download DeepSeek Harness
Open the official download page deepseek.com/en/download and download the DeepSeek Harness desktop app for your system. That page also offers the DeepSeek chat app, so do not pick the wrong installer. The desktop app supports Apple silicon on macOS 13 or later, and Windows 10 or later. Intel Macs are not supported yet; use the Web UI command below instead.
Start the Web UI
You can also install Node.js, then run the official command in a terminal. This works on macOS, Windows, Linux, and Intel Macs that cannot use the desktop app:
npx @deepseek-ai/dsh webBy default this opens the Web UI at http://127.0.0.1:3080. See also the official documentation and GitHub.
Configure with CC Switch
Open CC Switch, select DeepSeek Harness in the left sidebar, then click Add provider.
If it is missing, turn it on in the Apps page. Do not choose Codex or Claude Code.
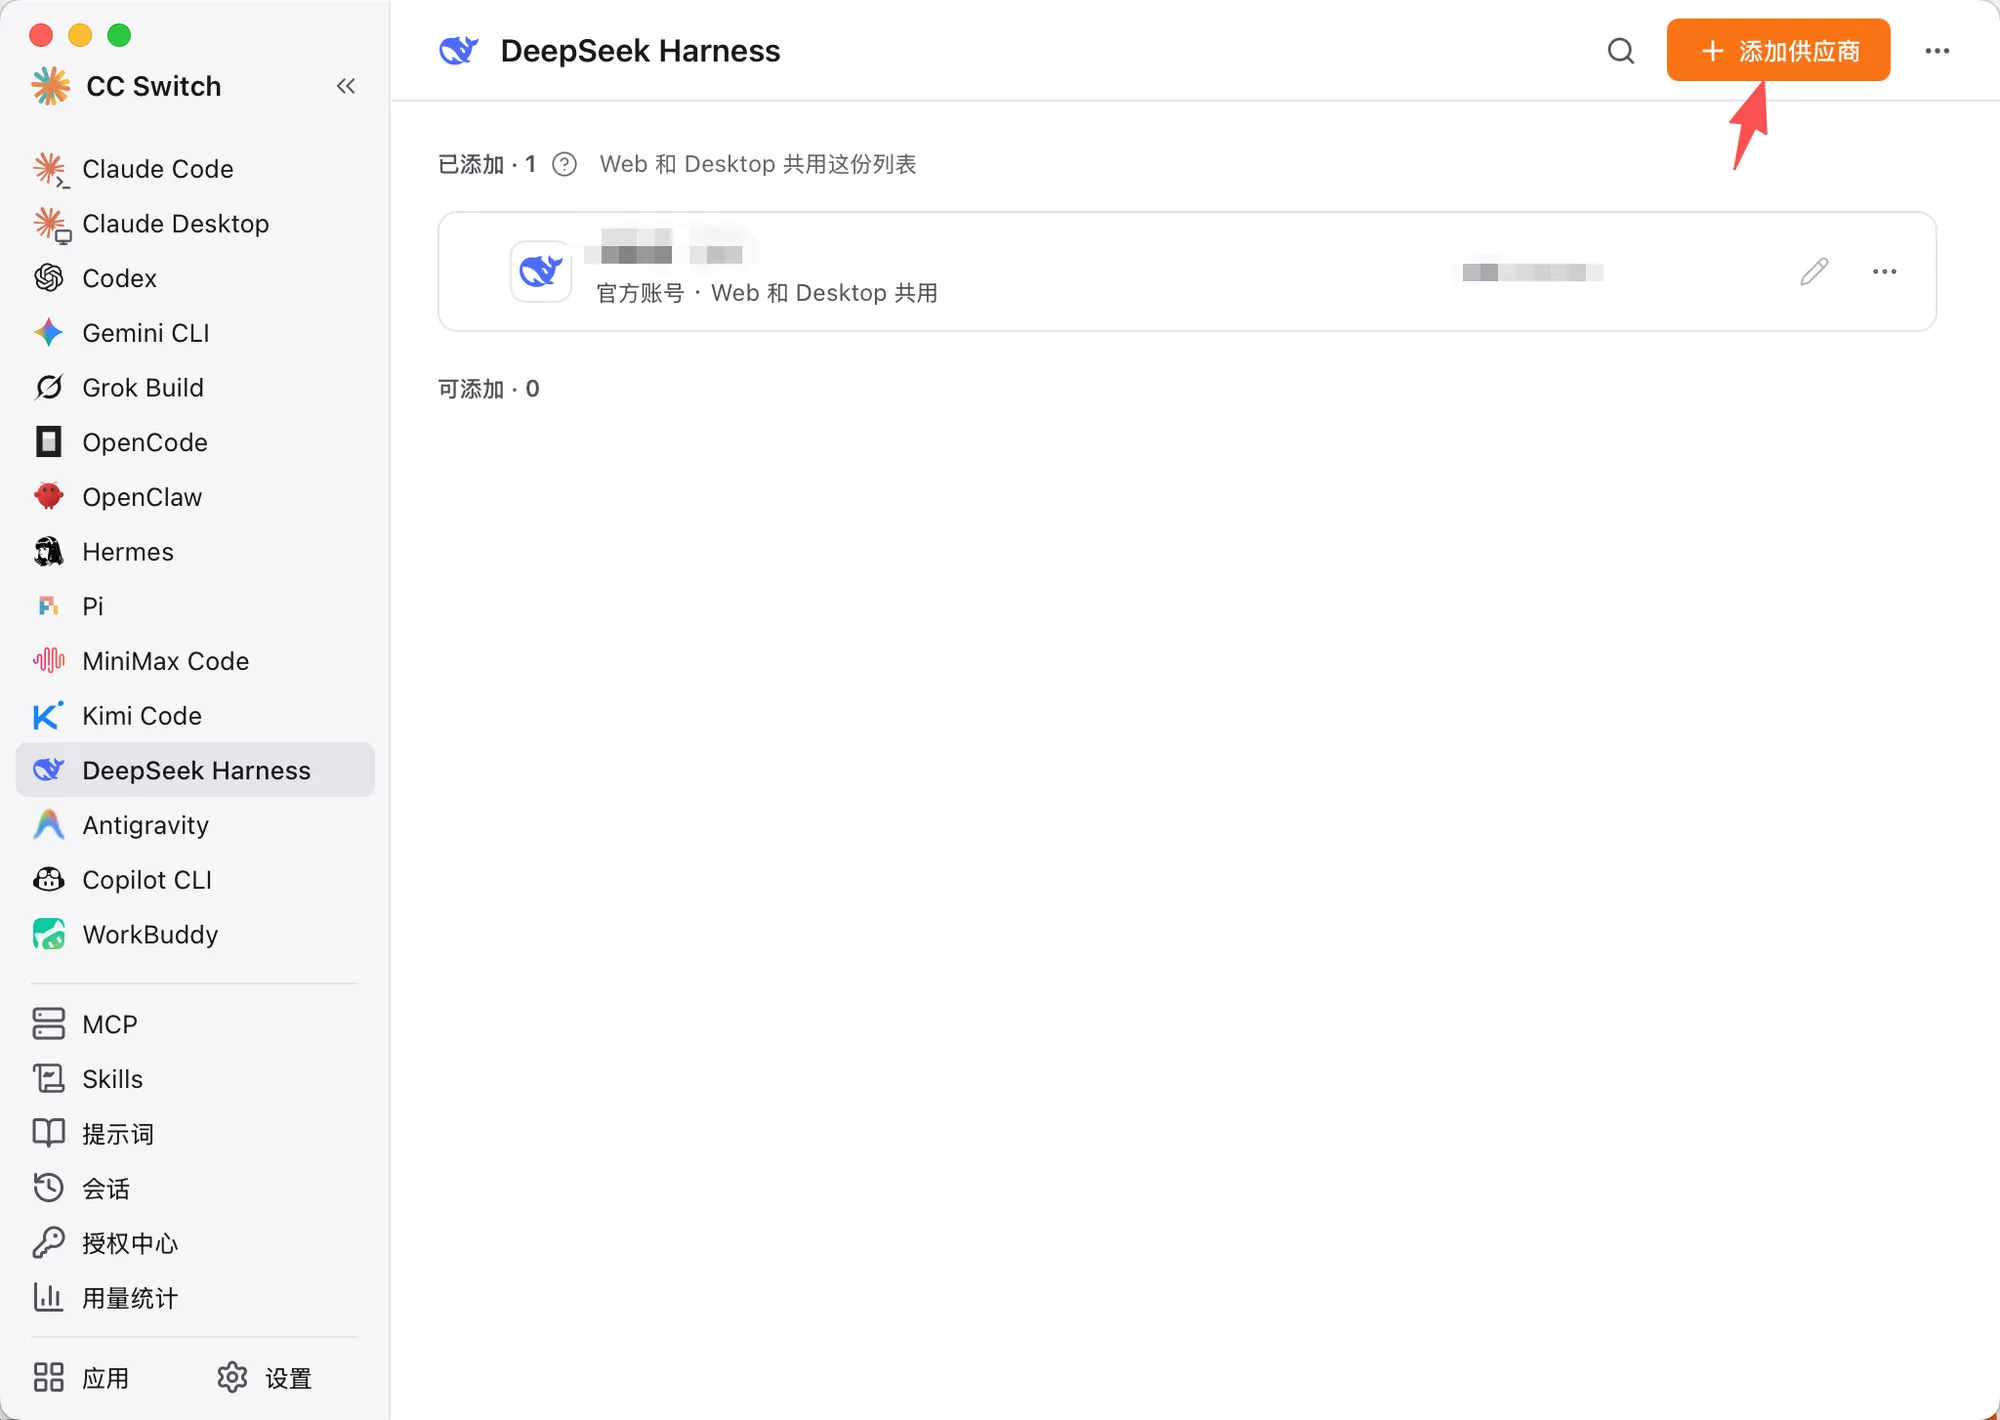
Select DeepSeek Harness on the left, then click Add provider. The Web UI and desktop app share this list. - Choose Custom
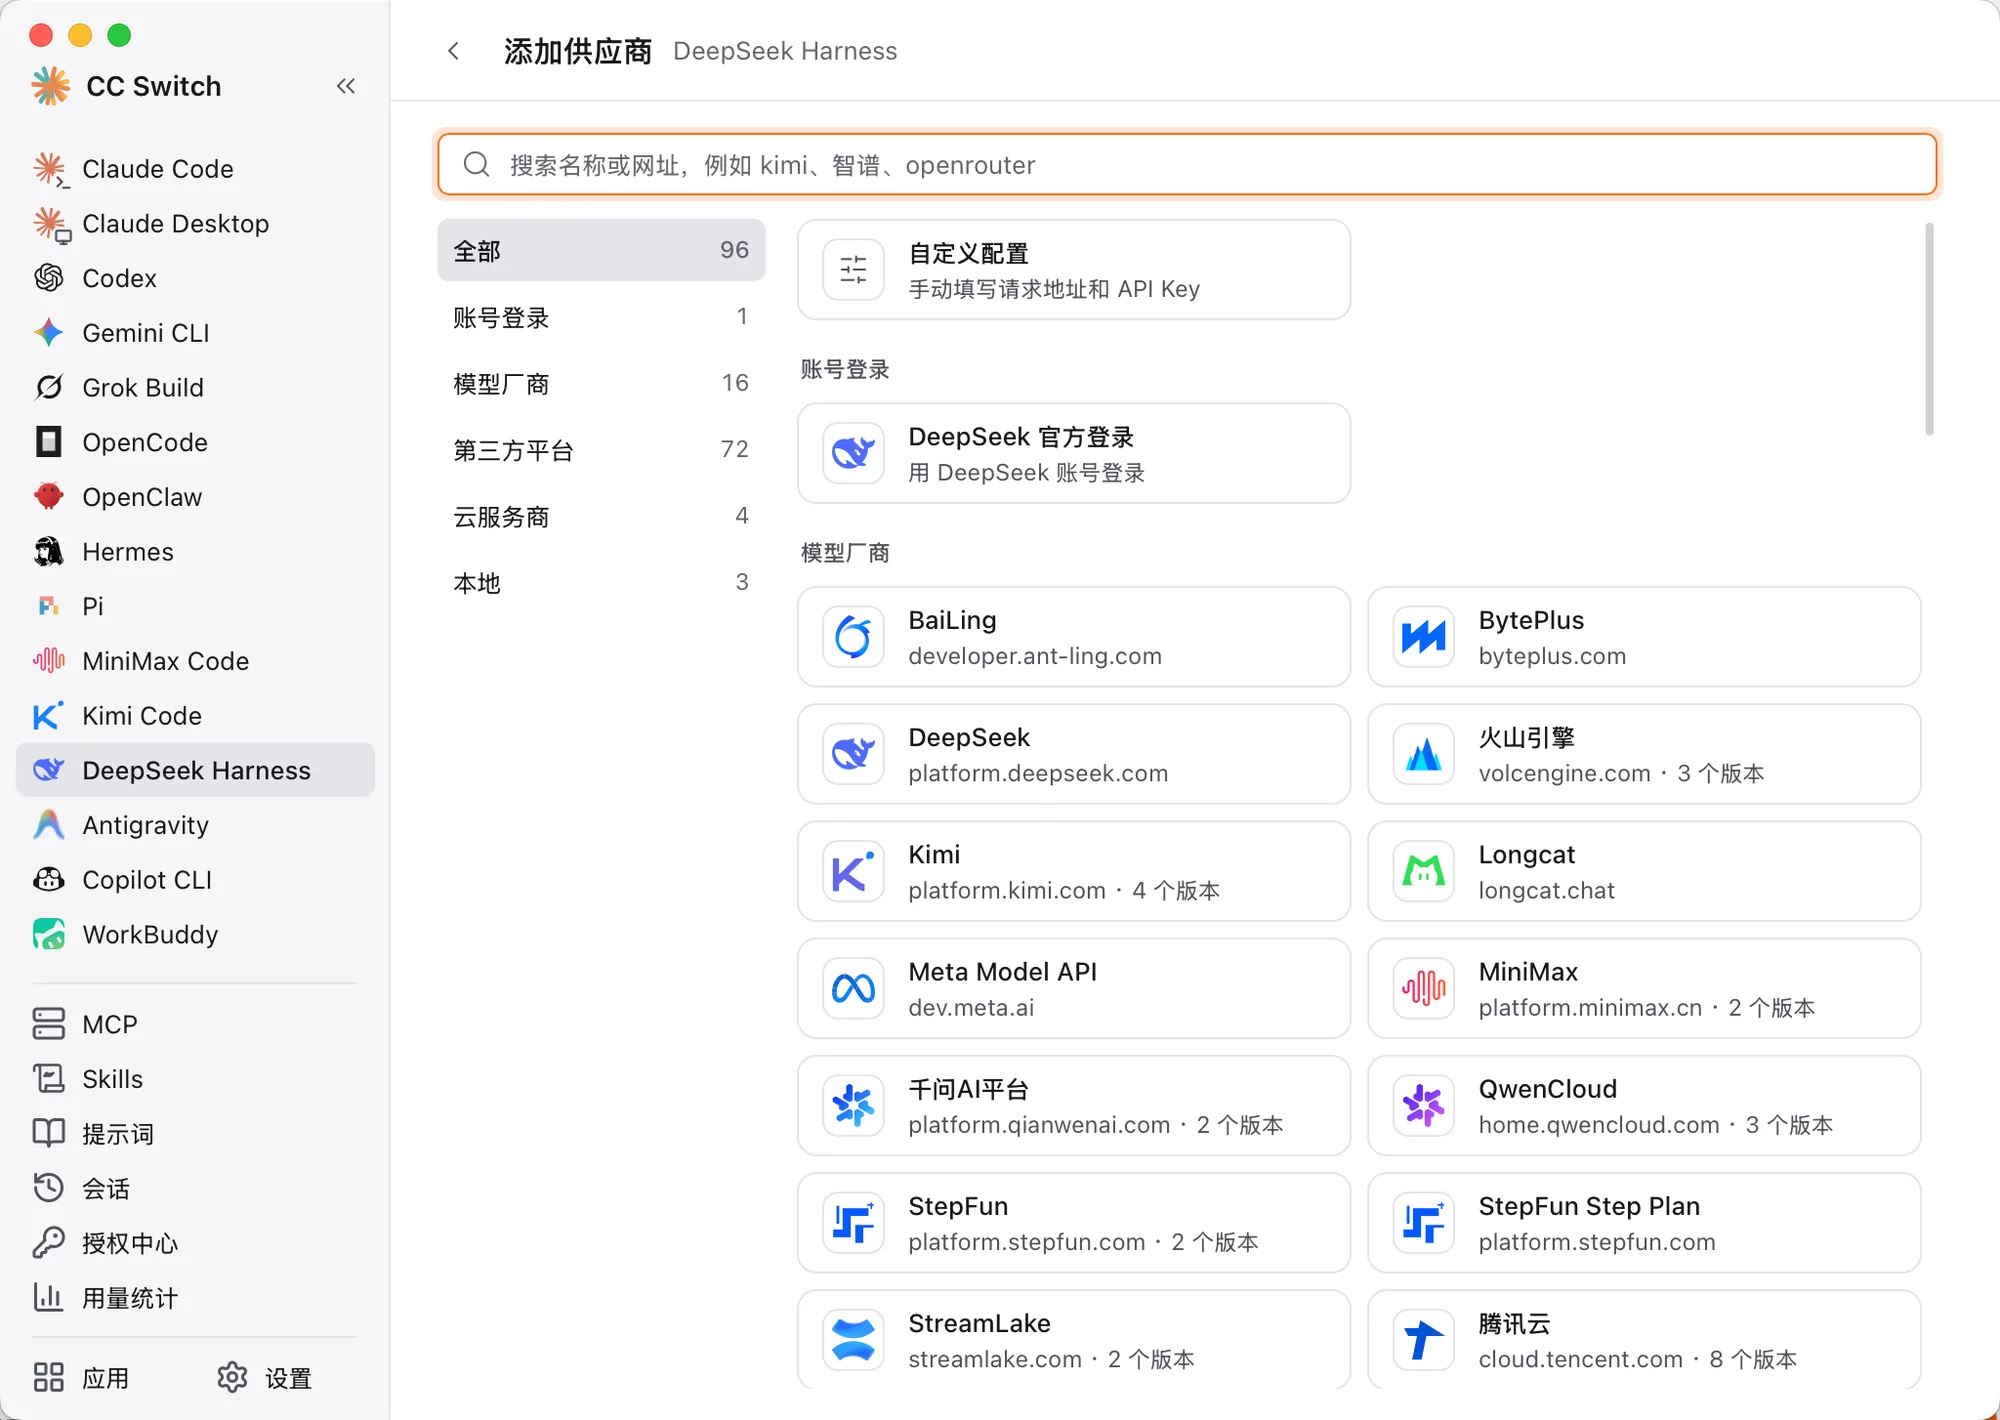
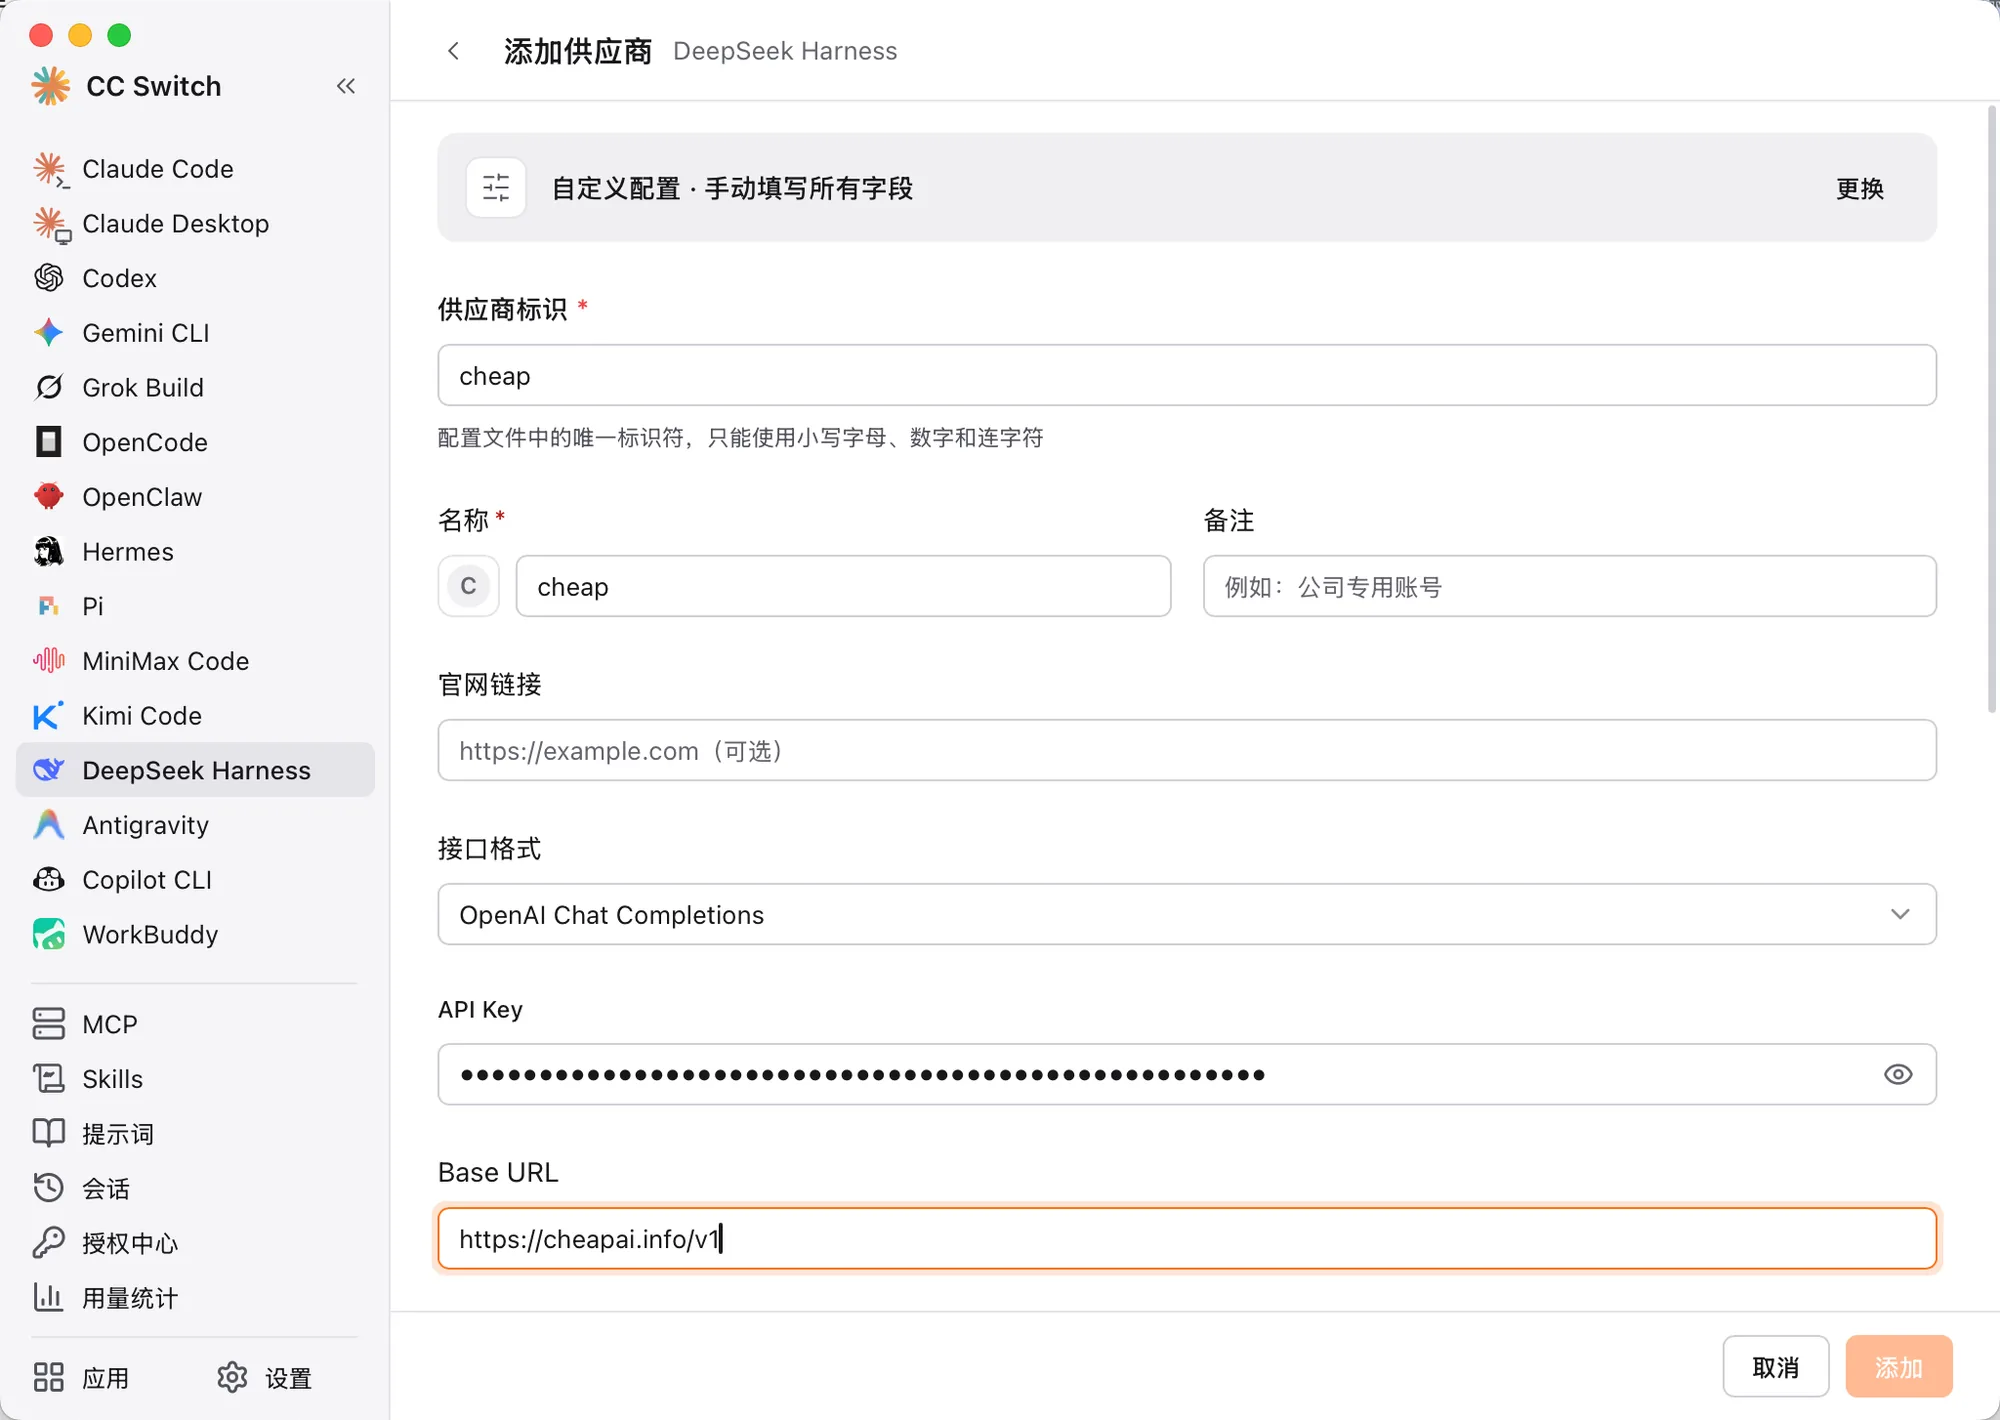
Fill in the following fields:
- Provider ID:
cheapai(lowercase letters, numbers, and hyphens only; this cannot be changed later) - Name:
CheapAI - API Key: paste the key from API Keys
- Choose the API format based on the models you use most:
- Mainly OpenAI (GPT) models: choose
OpenAI Responses - If you also use other domestic models: prefer
OpenAI Chat Completions - Mainly Anthropic (Claude) models: choose
Anthropic Messages
- Provider ID:
Click Fetch model list, check the models you want in the Select models dialog, then click Apply.
If the list does not load, click Add manually and enter a model ID from Models and pricing. Add at least one model before continuing.
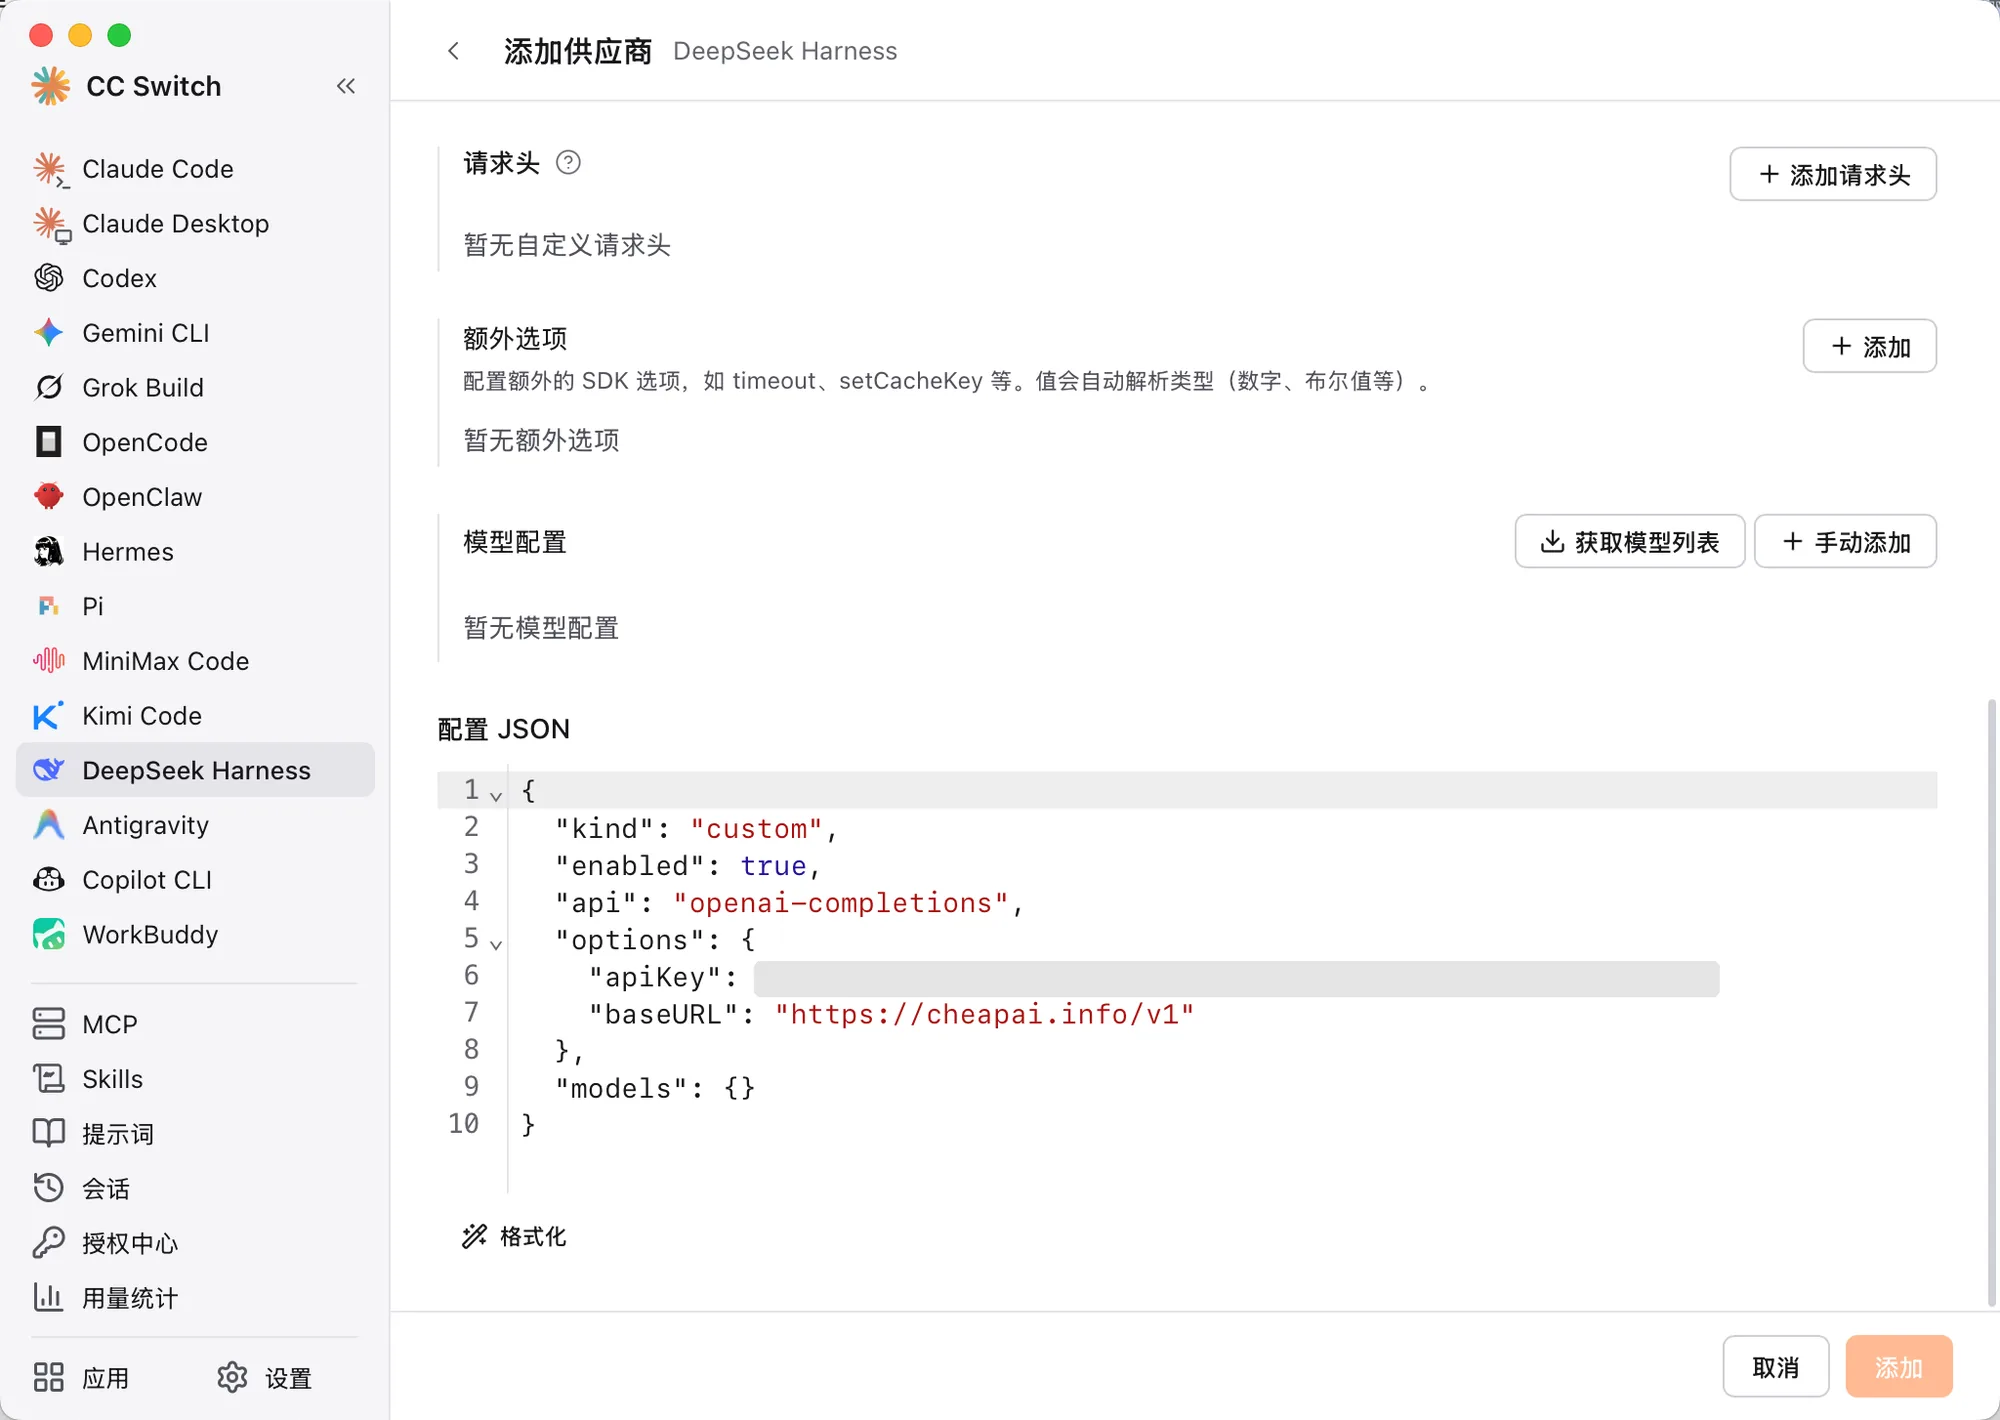
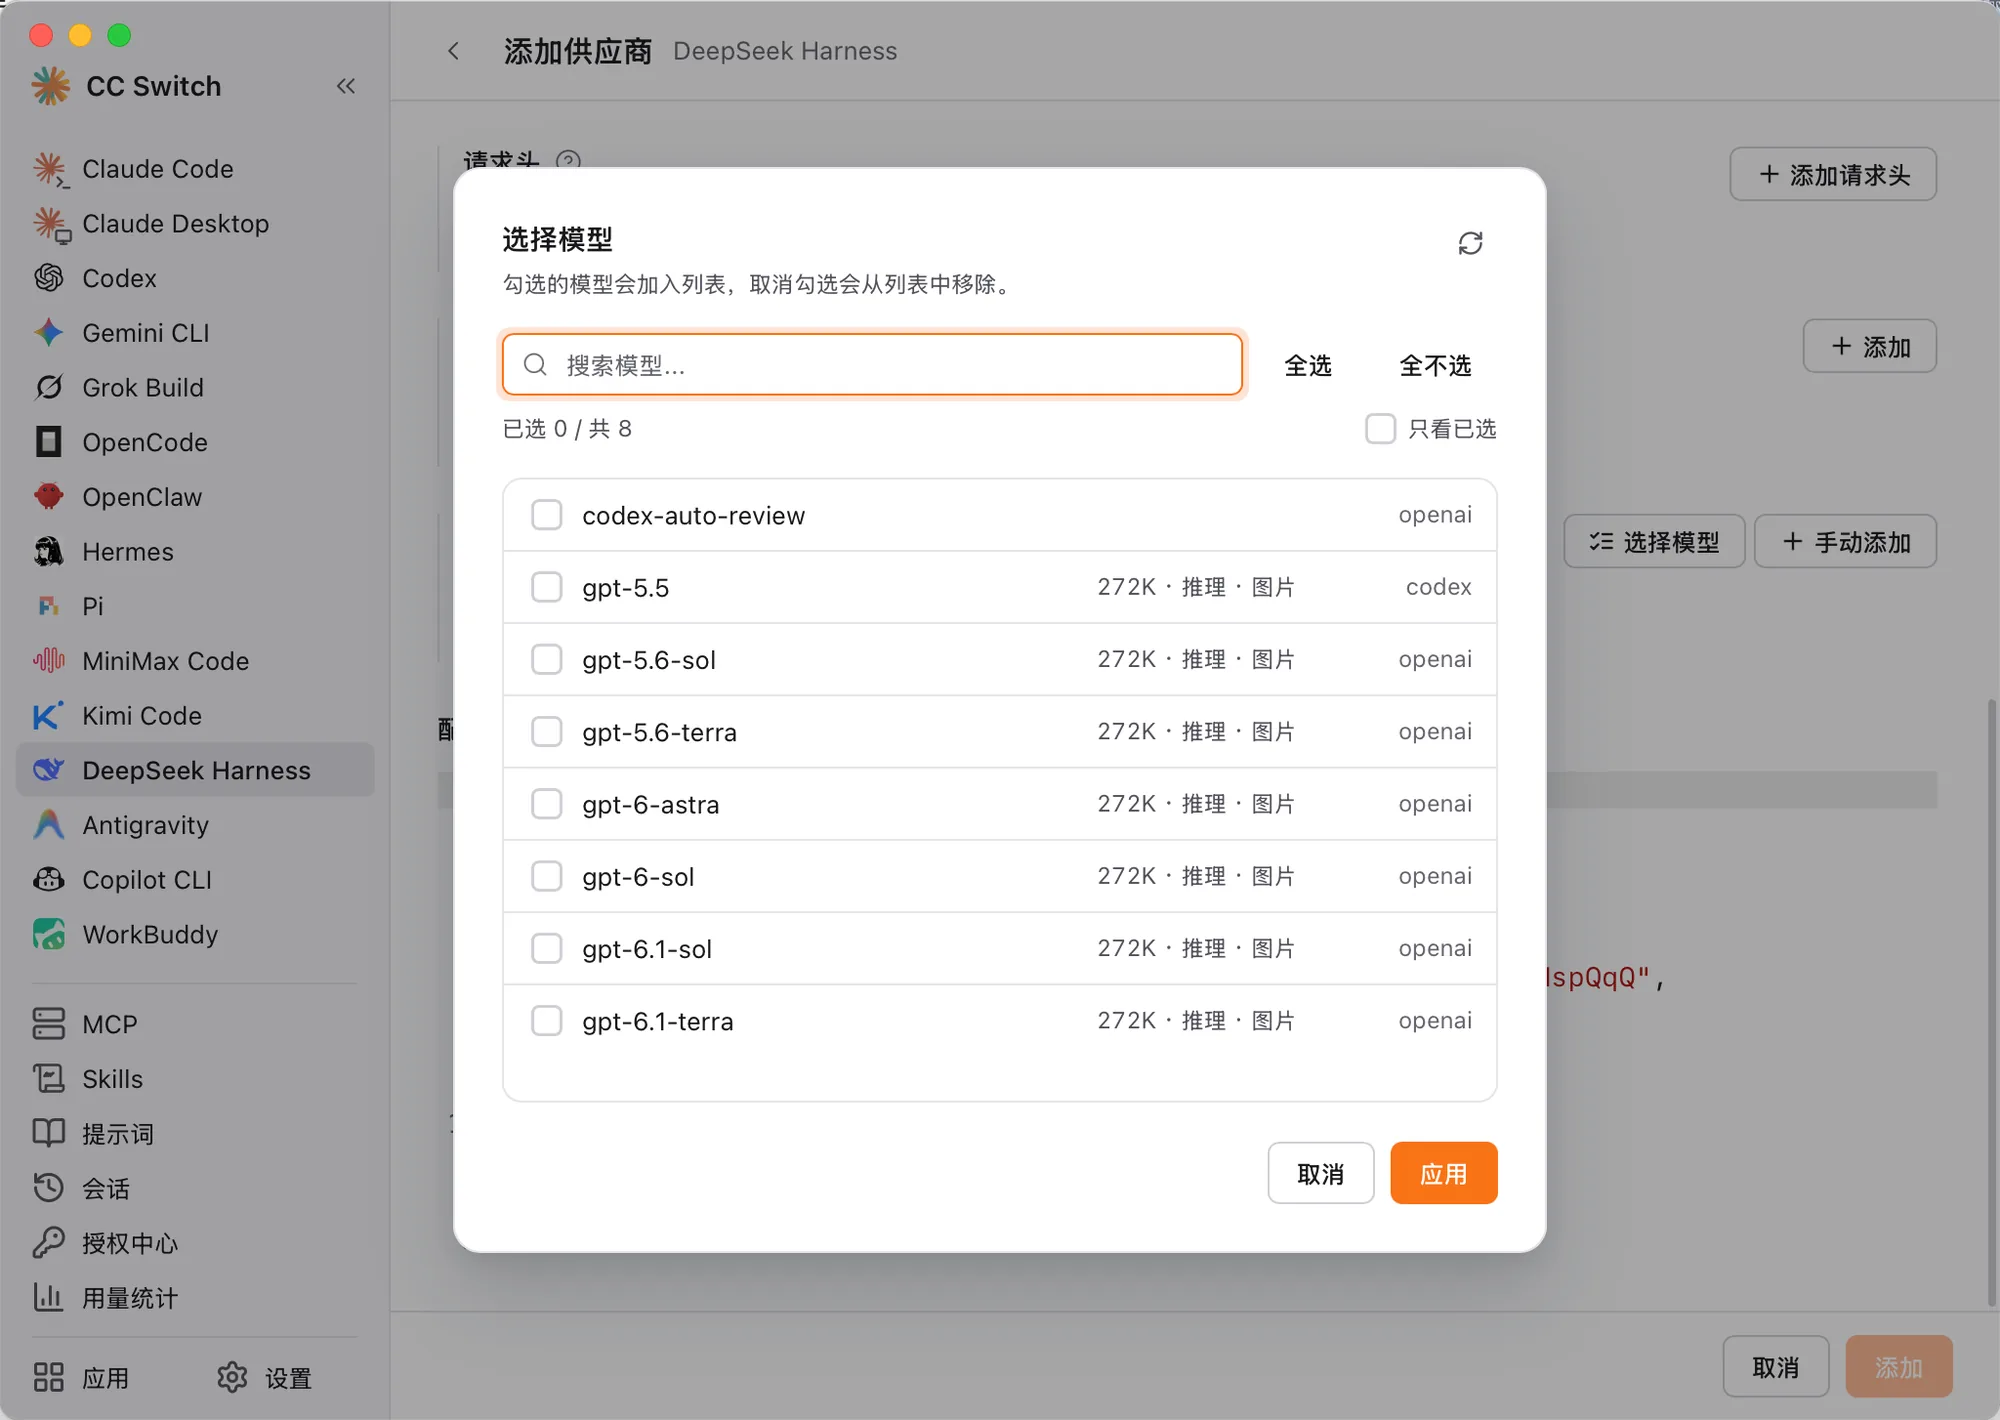
After you fetch the list, check models in Select models and click Apply. - When the models appear in the list, click Add. CheapAI should show In use (if not, click ▷ on the card). The Web UI and the desktop app share this provider list.
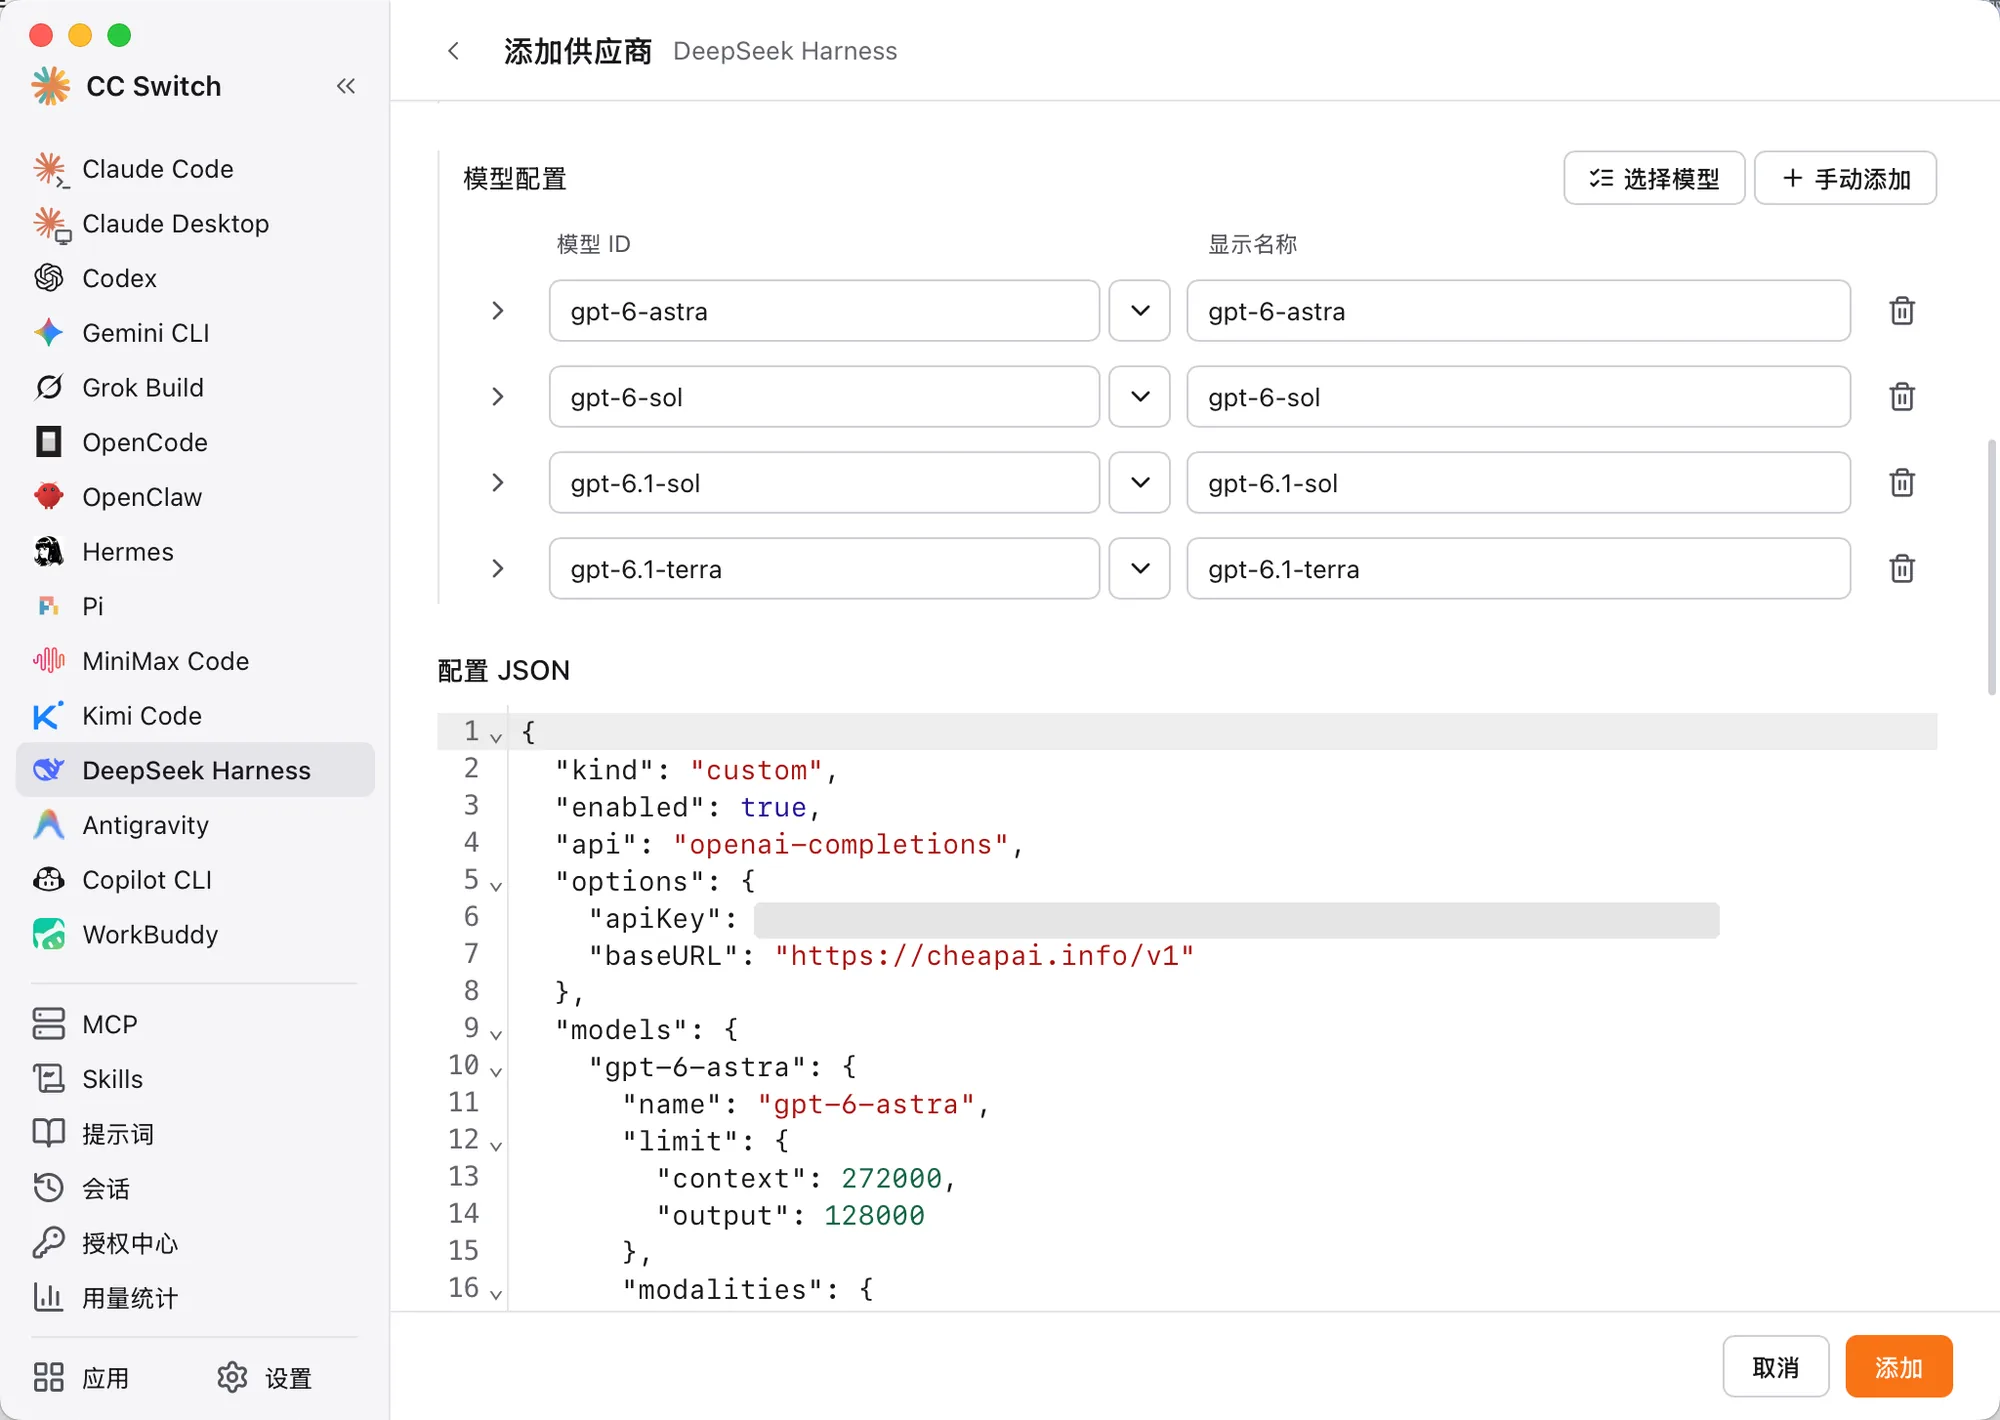
- Fully quit and reopen the DeepSeek Harness desktop app (do not just close the window). If you are using the Web UI, run
npx @deepseek-ai/dsh webagain.
Configure with Folkbench Switch
Open Folkbench Switch, then:
- Switch to Pro in the top-right
- Select DeepSeek Harness in the top bar (it may appear as DSH)
- Click + Add service
- Choose Quick fill from listed sites
- Pick CheapAI in the list
In Prepare service, confirm the protocol, API Base URL, and key:
- Mainly OpenAI (GPT) models: choose
OpenAI Responses - If you also use other domestic models: prefer
OpenAI Chat Completions - Mainly Anthropic (Claude) models: choose
Anthropic Messages
- API Key: paste the key from API Keys
- Model: pick one from the list, or enter an ID from Models and pricing
Then click Save.
- Mainly OpenAI (GPT) models: choose
Saving only adds it to the local list.
On the cheapai card at the bottom, click Switch.
- Fully quit and reopen the DeepSeek Harness desktop app (do not just close the window). If you are using the Web UI, run
npx @deepseek-ai/dsh webagain.
Manual setup
If you prefer not to use CC Switch or Folkbench Switch, you can add a custom provider in DeepSeek Harness: open Settings, go to the models page, and add a custom model API. Use the same Provider ID, API format, URL, key, and at least one model ID as above. The configuration is stored in ~/.dsh. For the full field reference, see the official provider guide.